HPTouchPad:Configuring webOS: Difference between revisions
mNo edit summary |
|||
| Line 9: | Line 9: | ||
==== Assumptions ==== | ==== Assumptions ==== | ||
* A PC running Windows 7 | * A PC running Windows 7 | ||
** Latest Java installed and running on | ** Latest Java installed and running on Windows 7. | ||
** Files necessary for this step available on the PC. | ** Files necessary for this step extracted and available on the PC: The Kids on Computers logo wallpaper files are on Google Drive as ''wallpaper.zip'' | ||
* An HP TouchPad (''Tenderloin'') that has been inspected, charged and updated according to [[HPTouchPad:Updating webOS|previous steps]]. | * An HP TouchPad (''Tenderloin'') that has been inspected, charged and updated according to [[HPTouchPad:Updating webOS|previous steps]]. | ||
==== Set the Kids on Computers logo wallpaper ==== | ==== Set the Kids on Computers logo wallpaper ==== | ||
* Boot the TouchPad | |||
* Connect the TouchPad to the PC with the provided USB cable | * Connect the TouchPad to the PC with the provided USB cable | ||
** A USB notification window will pop on TouchPad display. | ** A USB notification window will pop on TouchPad display. | ||
** Select USB Drive mode. | ** Select USB Drive mode. | ||
** | ** Windows Explorer will assign a device drive number to the TouchPad and will create a window open to the TouchPad's root directory. | ||
=====On the PC===== | =====On the PC===== | ||
| Line 31: | Line 30: | ||
** Copy a 64x64 .png file with the Kids on Computers logo to the <code>./thumbs</code> directory. | ** Copy a 64x64 .png file with the Kids on Computers logo to the <code>./thumbs</code> directory. | ||
* Eject the TouchPad from the PC and remove the USB cable. | |||
:[[NOTE: Do not remove the cable without first ejecting the TouchPad.]] | |||
=====On the TouchPad===== | =====On the TouchPad===== | ||
| Line 41: | Line 39: | ||
* Select it and verify. | * Select it and verify. | ||
* Go to '''Turn off After''' and set it to 10 minutes. | * Go to '''Turn off After''' and set it to 10 minutes. | ||
==== Back Up the webOS configuration ==== | ==== Back Up the webOS configuration ==== | ||
| Line 55: | Line 51: | ||
=== Kids on Computers Wallpaper Image === | === Kids on Computers Wallpaper Image === | ||
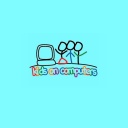
This is what the Kids on Computers wallpaper looks like. It will be identical in webOS and in CM-9. | |||
[[File:KOC_Logo_Tablet_Background.jpg|128 px]] | [[File:KOC_Logo_Tablet_Background.jpg|128 px]] | ||
Latest revision as of 14:30, 28 July 2013
Last Updated: 07/28/2013 By: BillM
Configuring the webOS Environment
This page describes changes to the webOS environment to achieve a prescribed Kids on Computers configuration. Changes to webOS are minimal since the emphasis is on the Android OS. The host system that was used to develop these steps is a PC running Windows 7. Other host system options exist.
The previous step was to update webOS to 3.0.5.
Assumptions
- A PC running Windows 7
- Latest Java installed and running on Windows 7.
- Files necessary for this step extracted and available on the PC: The Kids on Computers logo wallpaper files are on Google Drive as wallpaper.zip
- An HP TouchPad (Tenderloin) that has been inspected, charged and updated according to previous steps.
Set the Kids on Computers logo wallpaper
- Boot the TouchPad
- Connect the TouchPad to the PC with the provided USB cable
- A USB notification window will pop on TouchPad display.
- Select USB Drive mode.
- Windows Explorer will assign a device drive number to the TouchPad and will create a window open to the TouchPad's root directory.
On the PC
- In the window displaying the TouchPad's root directory, open
/wallpapers - Delete the HP-provided wallpaper .jpg files
- Copy the 1024x1024 .jpg file with the Kids on Computers logo to this directory
- Open
/.wallpapers- delete the files found there and under
./thumbs - Copy a 1024x1024 .png file with the Kids on Computers logo to this directory
- Copy a 64x64 .png file with the Kids on Computers logo to the
./thumbsdirectory.
- delete the files found there and under
- Eject the TouchPad from the PC and remove the USB cable.
On the TouchPad
- In SETTINGS select Screen & Lock
- Select Change Wallpaper
- The TouchPad should offer only one wallpaper file option: the KoC Logo
- Select it and verify.
- Go to Turn off After and set it to 10 minutes.
Back Up the webOS configuration
- In SETTINGS select Backup
- Select Back Up Now
- When the backup is finished, reboot
- Verify after rebooting that the wallpaper is correct and the settings are as established above.
The process from first booting webOS to this point takes less than an hour.
The TouchPad is now ready for CyanogenMod 9 installation.
Kids on Computers Wallpaper Image
This is what the Kids on Computers wallpaper looks like. It will be identical in webOS and in CM-9.

